Projects
A selection of recent composite boat building, repairs, and refits completed across the Sunshine Coast and South East Queensland.
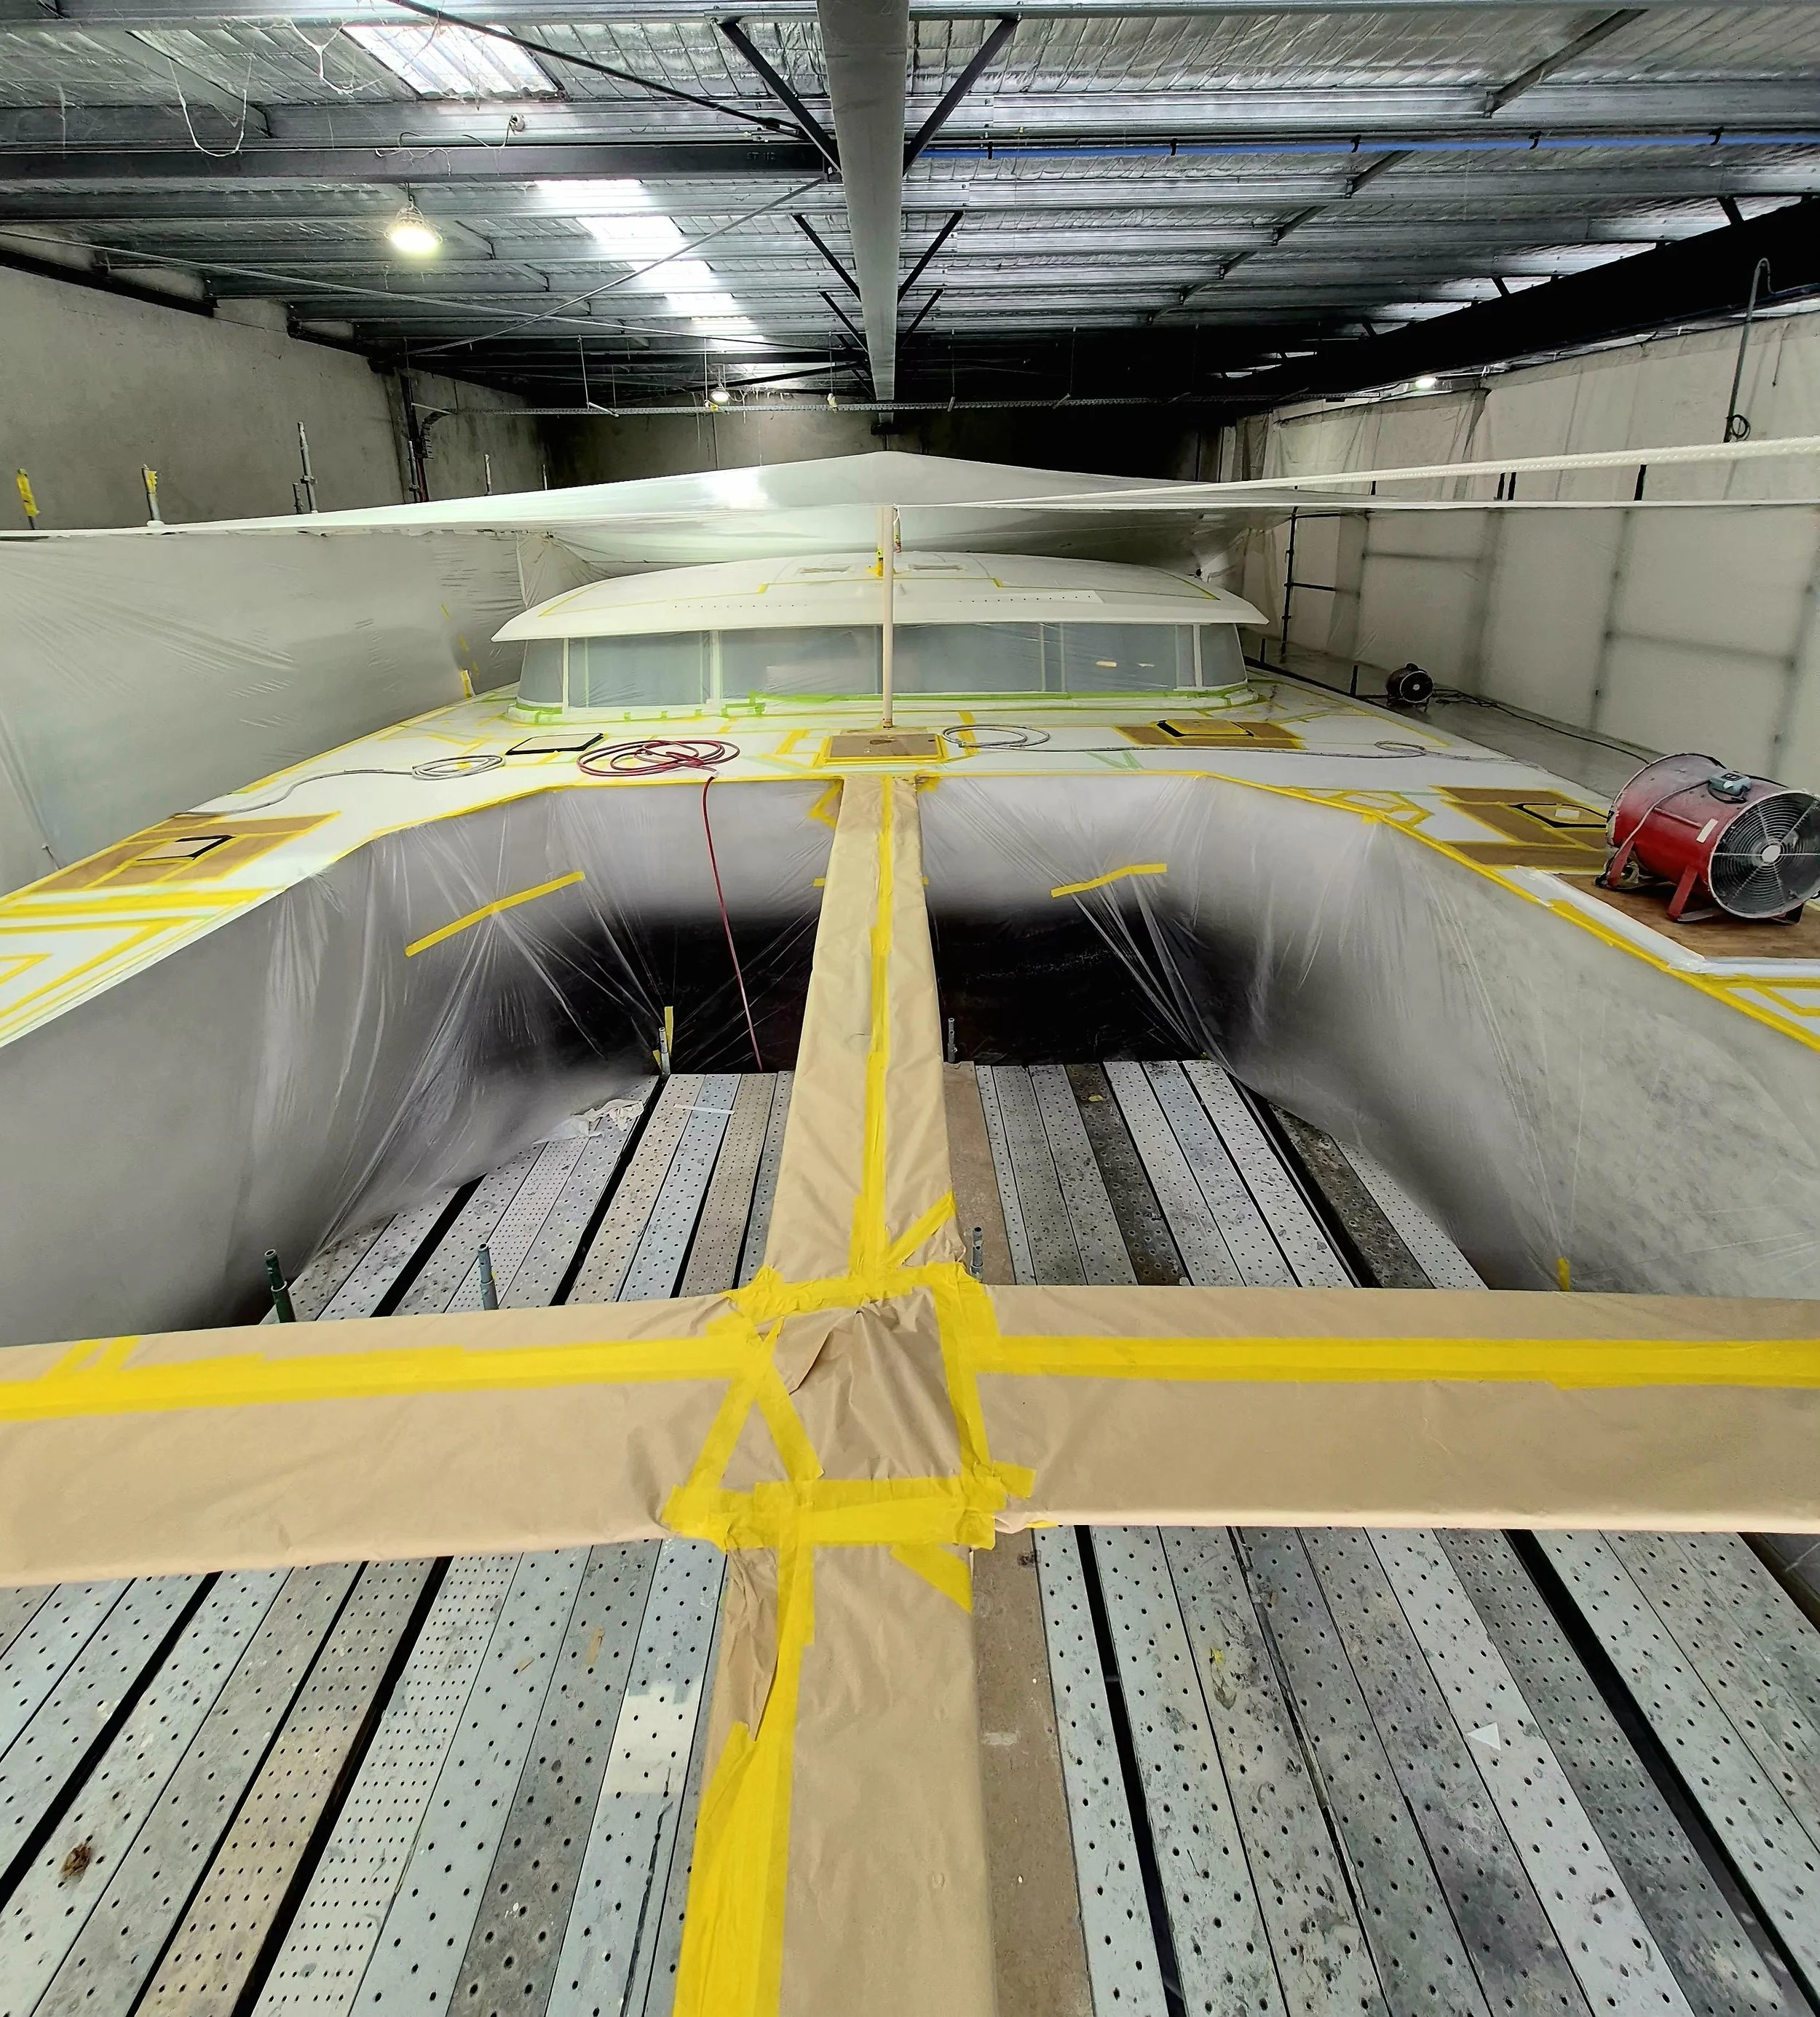
Marine Composite Construction
Structural Build Process
Composite structural fit-out completed on a 55ft carbon catamaran, including bulkheads, hatch installations, and internal bonding work.
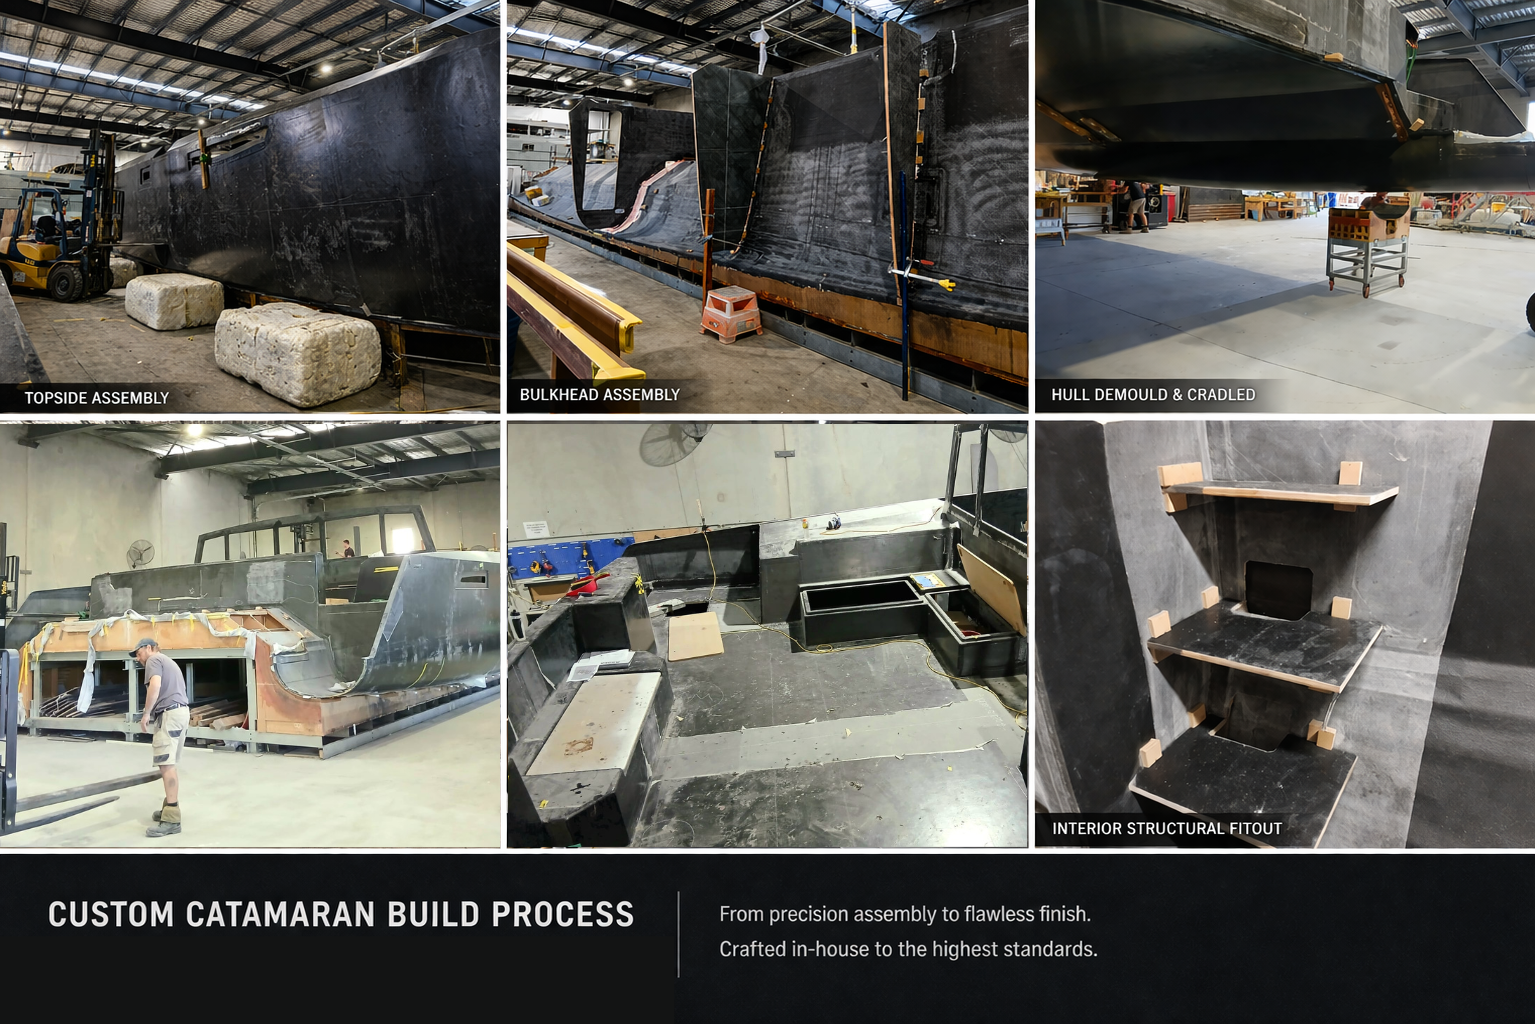
Structural bulkheads
Composite bonding
Hatch installations
Internal fit-out
Scope of Work
Built to engineered specifications with a focus on structural integrity and long-term performance.

Custom staircase installation completed as part of the structural fit-out on this composite catamaran.
Each step was precision positioned, bonded and laminated to engineering specifications, ensuring long-term strength, durability and a clean integrated finish.
Structural Stair Installation – Catamaran
Layout and positioning of structural stair treads
Preparation and surface conditioning for secondary bonding
Bonding of steps using structural adhesive system
Filleting and composite taping to engineering specifications
Integration into surrounding hull structure
Final fairing and preparation for finish stages
Scope of Work
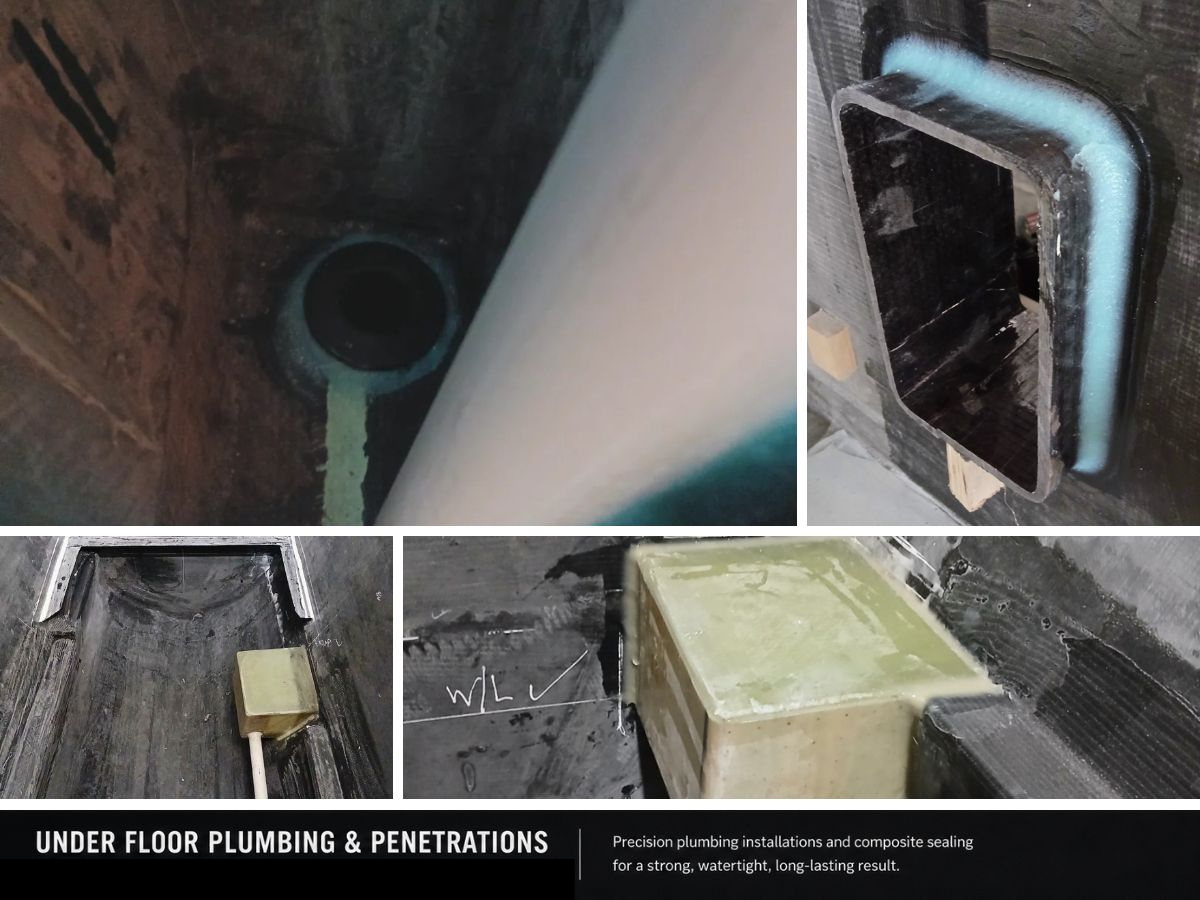
Under Floor Plumbing & Penetrations – Catamaran
Custom under floor plumbing and composite penetrations completed.
This stage includes grey water drainage, bulkhead penetrations, underfloor plumbing fitout, and integrated shower sump installation. All sealed and bonded for a strong, watertight, long-lasting result.
Scope of Work:
Bulkhead penetration reinforcement
Grey water drainage system installation
Underfloor plumbing layout and routing
Shower sump integration
Composite sealing and bonding
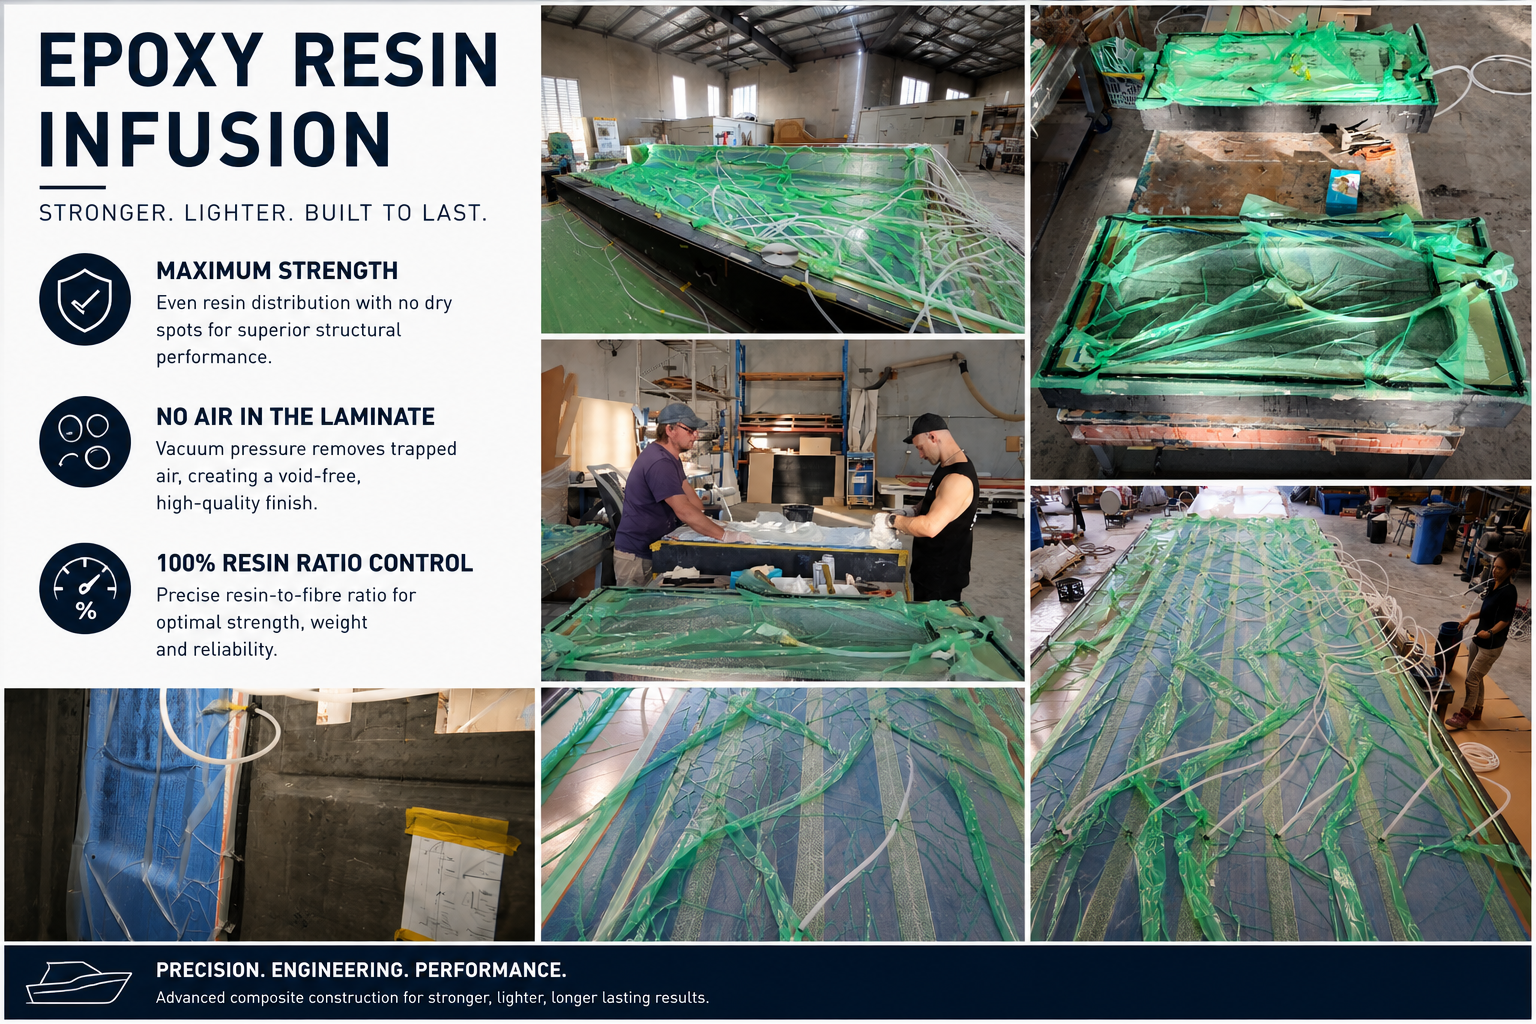
Vacuum infused composite panels engineered for maximum strength, reduced weight, and consistent resin control throughout the laminate process.
Epoxy Resin Infusion
Scope of Work
Epoxy resin infusion setup
Vacuum bagging and laminate preparation
Resin feed and vacuum line installation
Composite panel manufacturing
Structural laminate consolidation
Precision resin-to-fibre ratio control
Lightweight high-strength composite construction
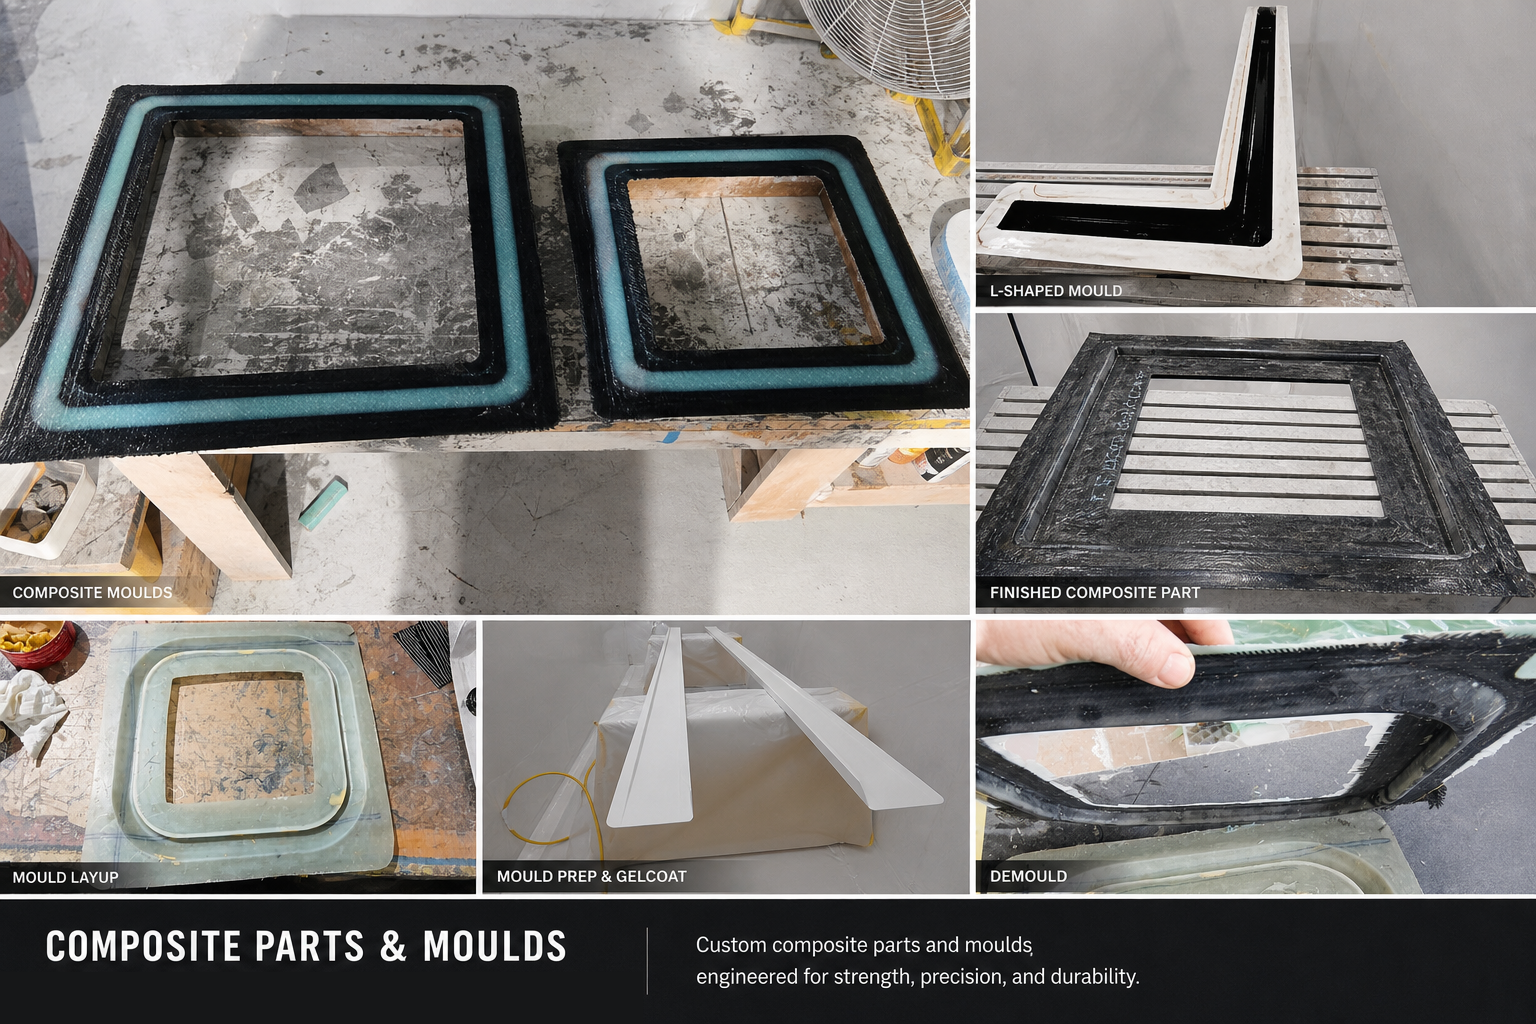
Composite Parts & Moulds
Custom composite parts and moulds manufactured for vessel modifications.
This process includes mould preparation, gelcoat application, composite layup, and final demoulding. Delivering strong, precise, and durable components built for marine environments.
Scope of Work:
Composite mould fabrication
Gelcoat preparation and application
Carbon and fibreglass layup
Structural part manufacturing
Precision demoulding and finishing
Custom Composite Work & Alterations
Bow Thruster Installation
Structural Composite Integration
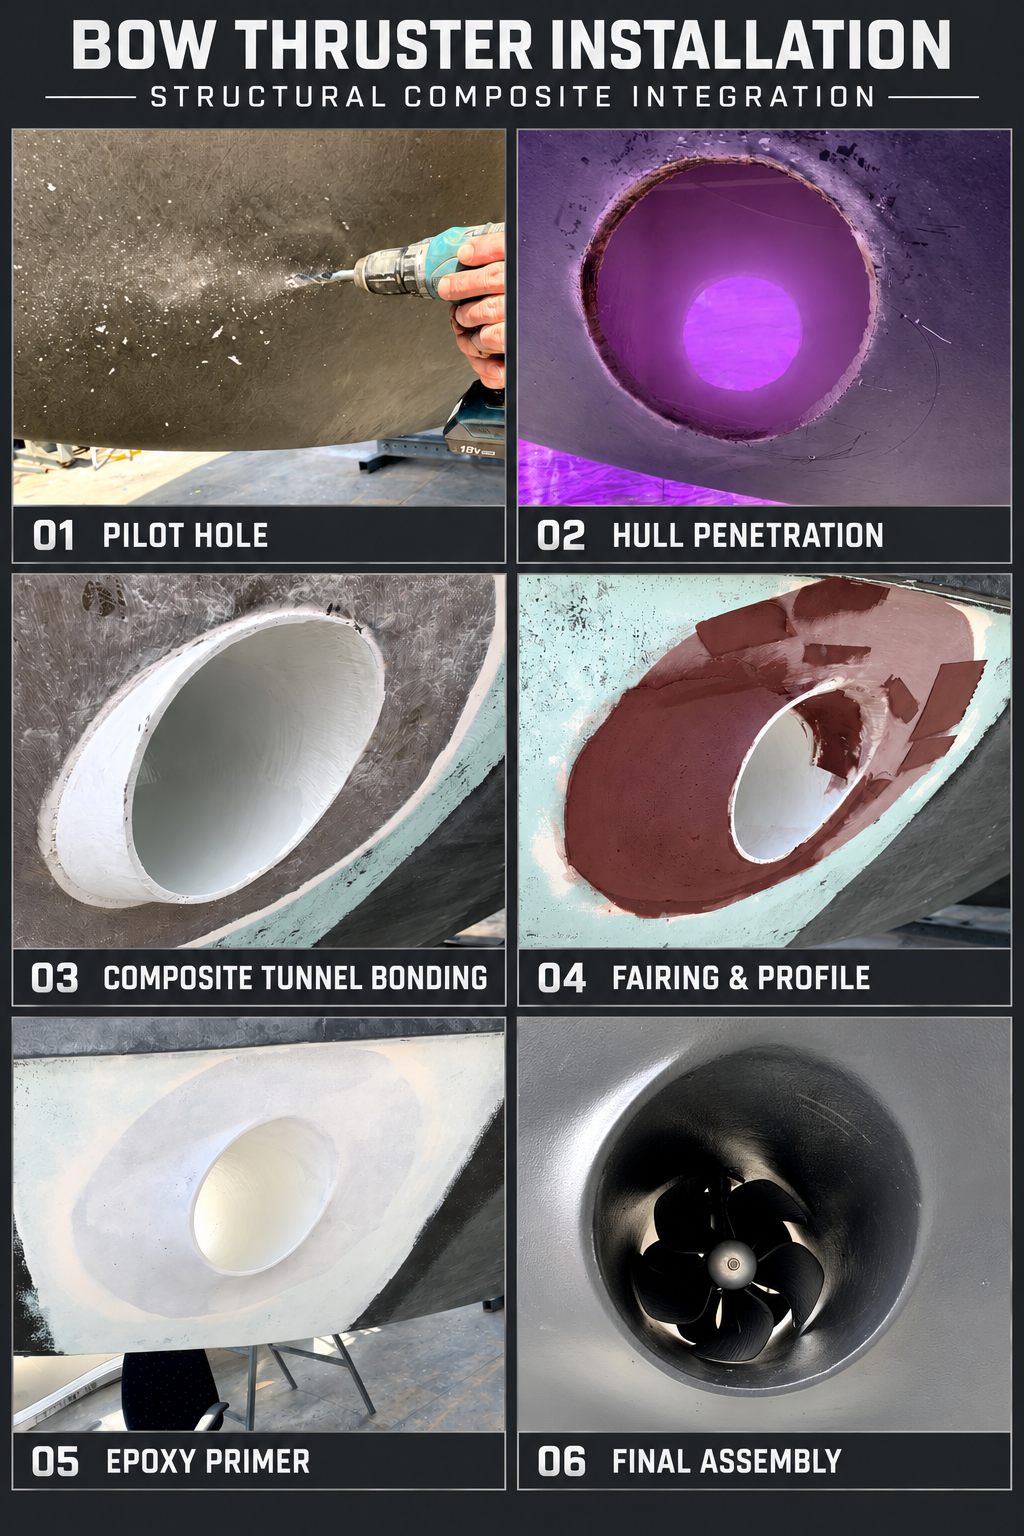
Installation of a bow-thruster tunnel into an existing composite hull, completed as part of a major vessel refit.
The process involved accurately positioning the thruster, creating the hull penetrations and fitting the composite tunnel before structurally laminating it into the surrounding hull. The external profile was then faired, sealed and epoxy primed before final assembly of the thruster unit.
The completed installation provides a strong, clean and fully integrated result designed for reliable operation and long-term service.
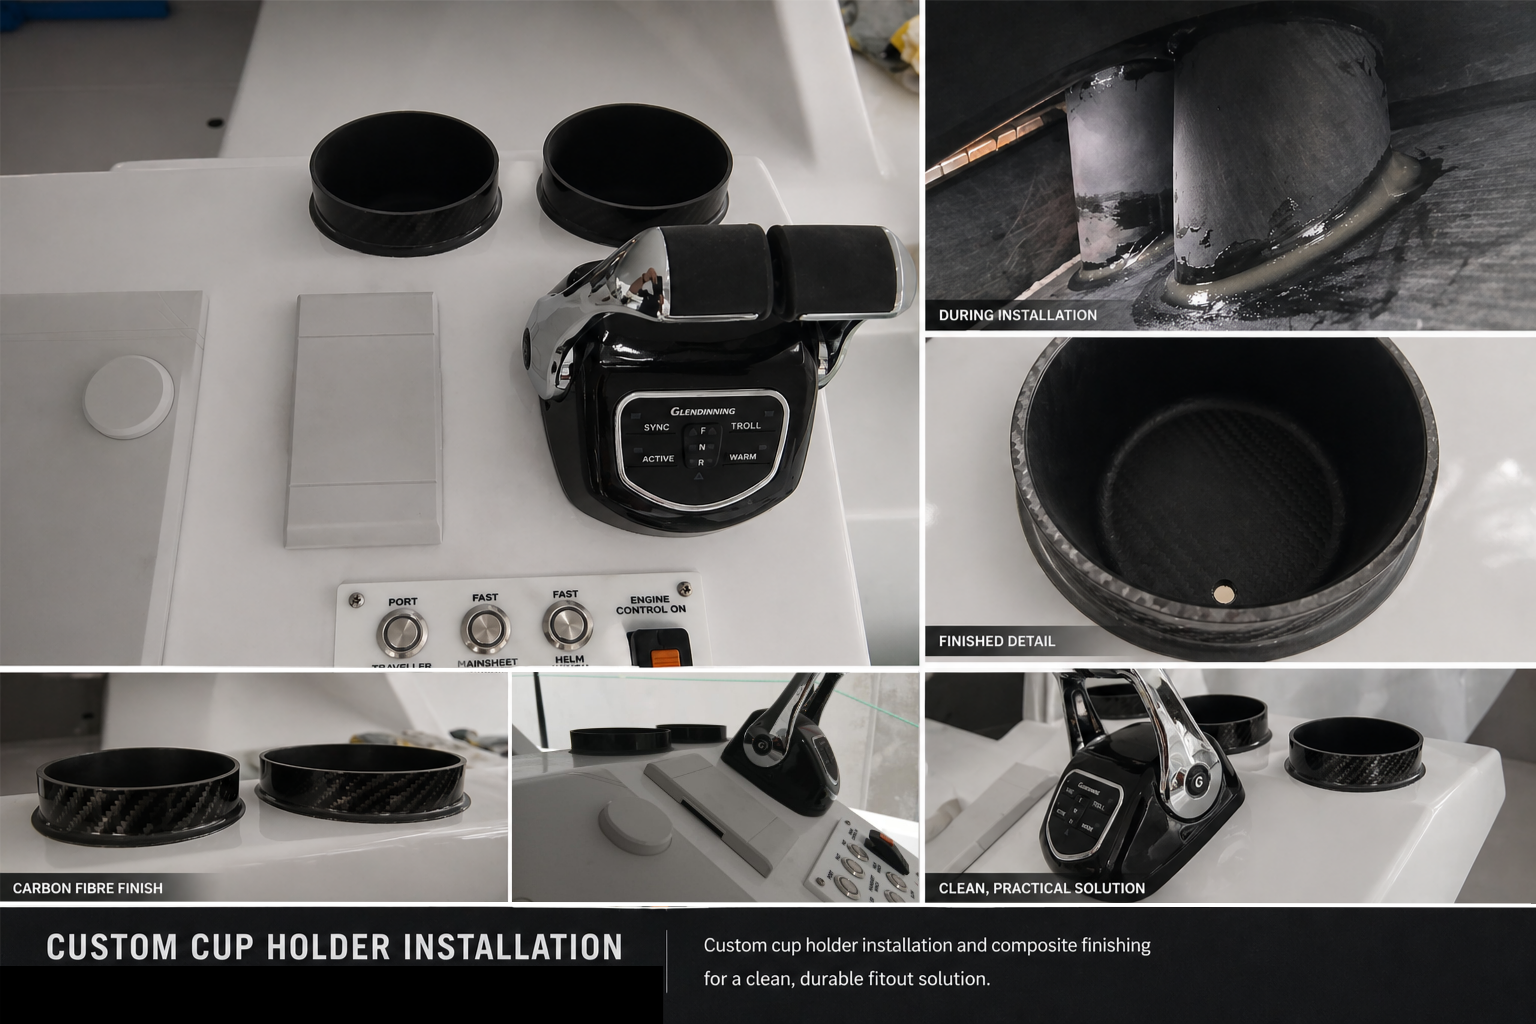
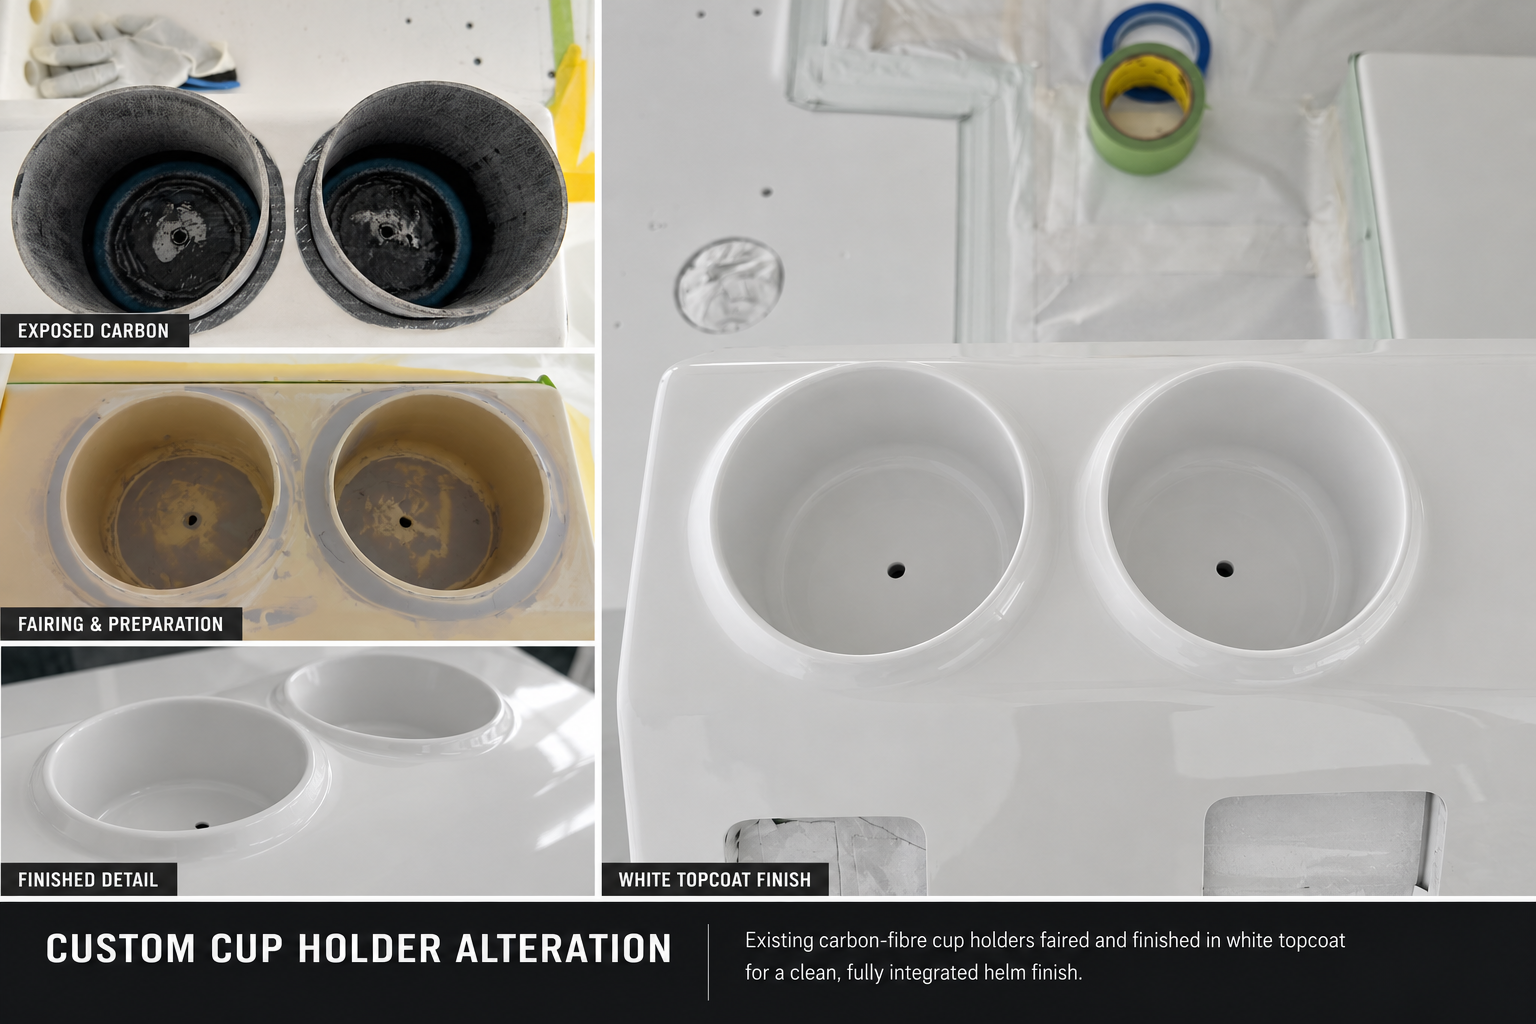
Clean, integrated carbon fibre cup holders built into the helm station for durability and everyday usability.
Custom Fitout – Helm Cup Holder Installation
Scope of Work
Custom layout and positioning within helm station
Precision cut-outs and integration into existing structure
Bonding and composite finishing for durability
Clean alignment with helm controls and surrounding surfaces
Topcoat Finish Alteration
Following the original carbon-fibre installation, the custom cup holders were faired and refinished in white topcoat to create a clean, seamless finish that integrates with the surrounding helm structure.
Custom Moulded Keel Guard
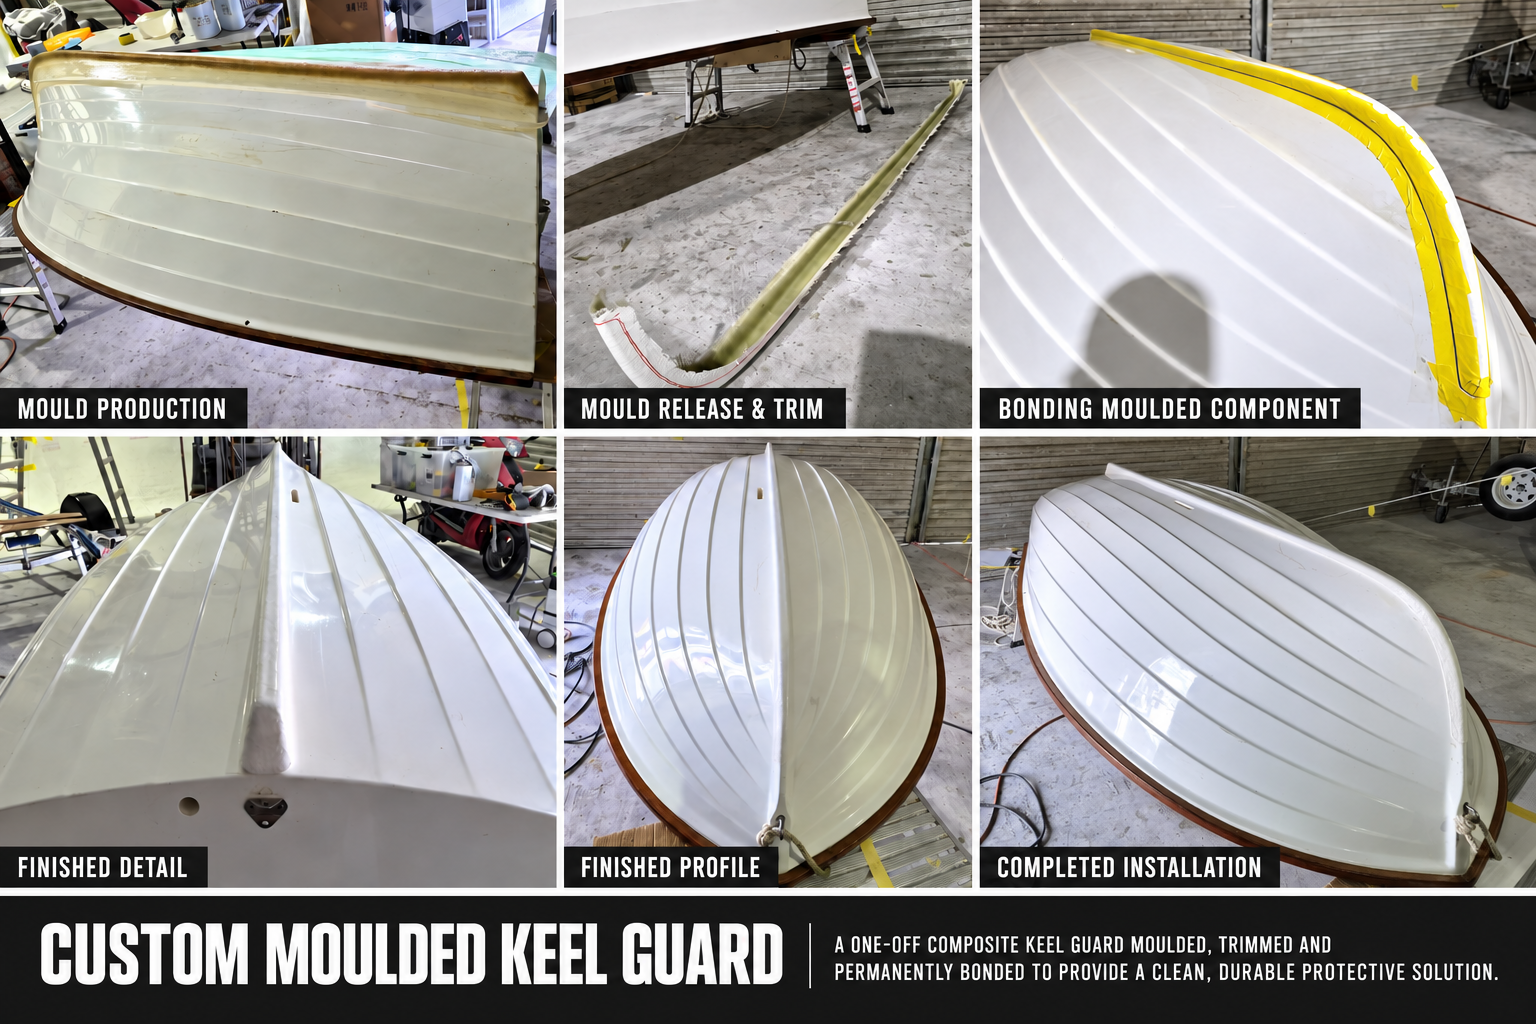
Composite Protection Built to Fit
A custom composite keel guard was produced to protect the vulnerable keel area where a standard adhesive-backed product was unsuitable for the hull’s tight radiuses and changing profile.
The component was moulded directly to match the existing hull shape, released and trimmed before being permanently bonded into position. The completed guard provides a strong, clean and durable sacrificial layer while retaining the vessel’s original keel profile.
Fit-Outs & Refits
Thermo-Lite Composite Deck Replacement
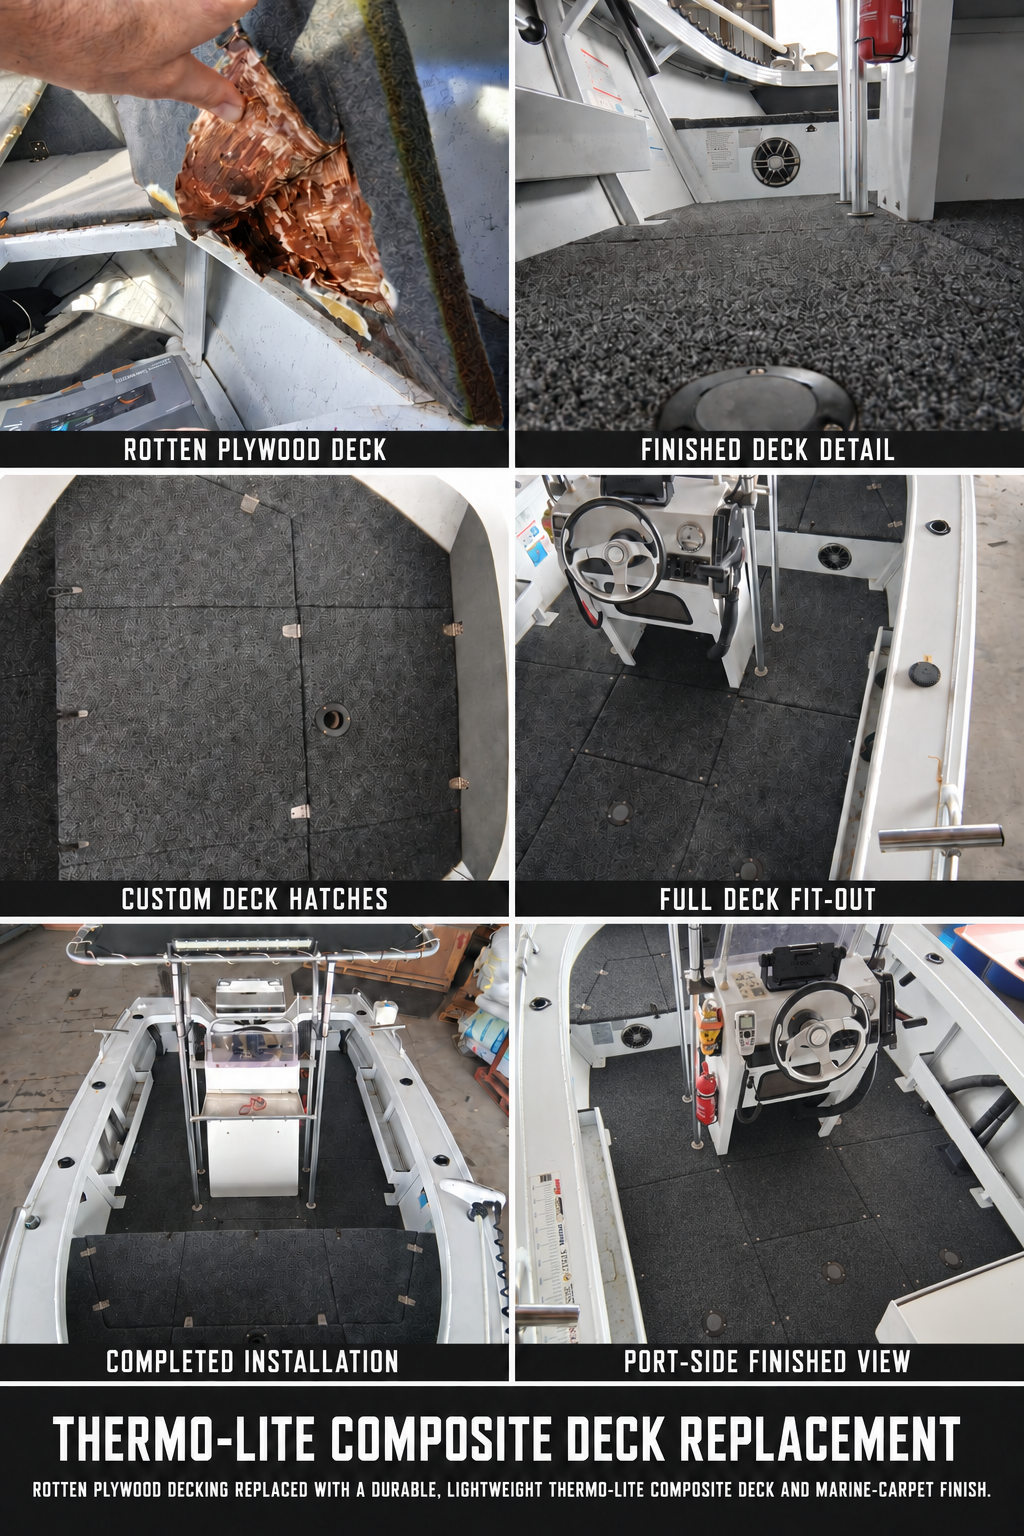
Lightweight, Rot-Proof Decking Solution
The vessel’s original plywood deck had suffered extensive water damage and deterioration, leaving it unsuitable for continued use.
The damaged flooring was removed and replaced with a custom-fitted Thermo-Lite composite deck system. Each panel and access hatch was accurately shaped to suit the existing layout, finished in marine carpet and securely installed around the helm, seating and onboard fittings.
The completed deck provides a strong, lightweight and permanently rot-resistant replacement while maintaining full access to the vessel’s existing storage and service areas.
Scope of Works
Inspection of the existing deck structure
Removal of rotten plywood decking
Existing layout and hatch templating
Fabrication of Thermo-Lite composite deck panels
Custom fabrication of removable access hatches
Panel fitting and alignment
Marine-carpet installation
Reinstallation of deck hardware and fittings
Final fitment, inspection and clean-up
Repairs & Custom Alterations
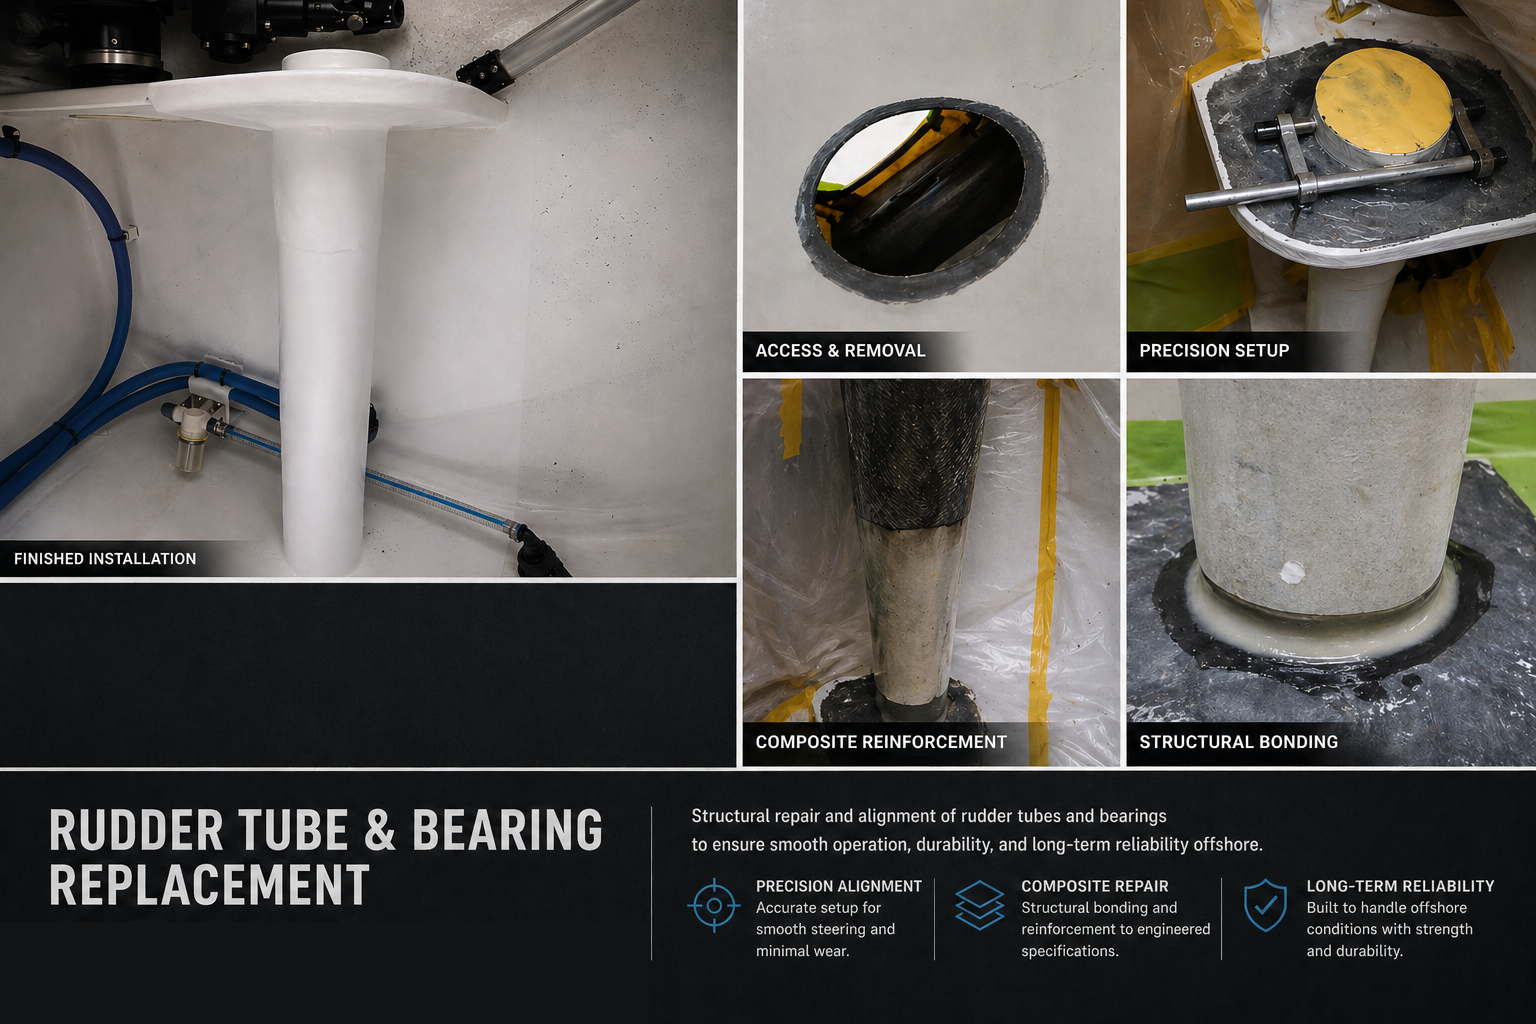
Repair/Alteration - Rudder Tube & Bearing Replacement
Replacement of existing rudder tubes with a fully integrated rudder bearing system, delivering smooth, precise steering and long-term reliability.
Scope of Work:
Removal of existing rudder tubes and bearings
Access cut and preparation of surrounding structure
Precision alignment setup for new rudder system
Installation of new rudder tubes and bearing housings
Structural composite bonding and reinforcement
Sealing and finishing for long-term durability
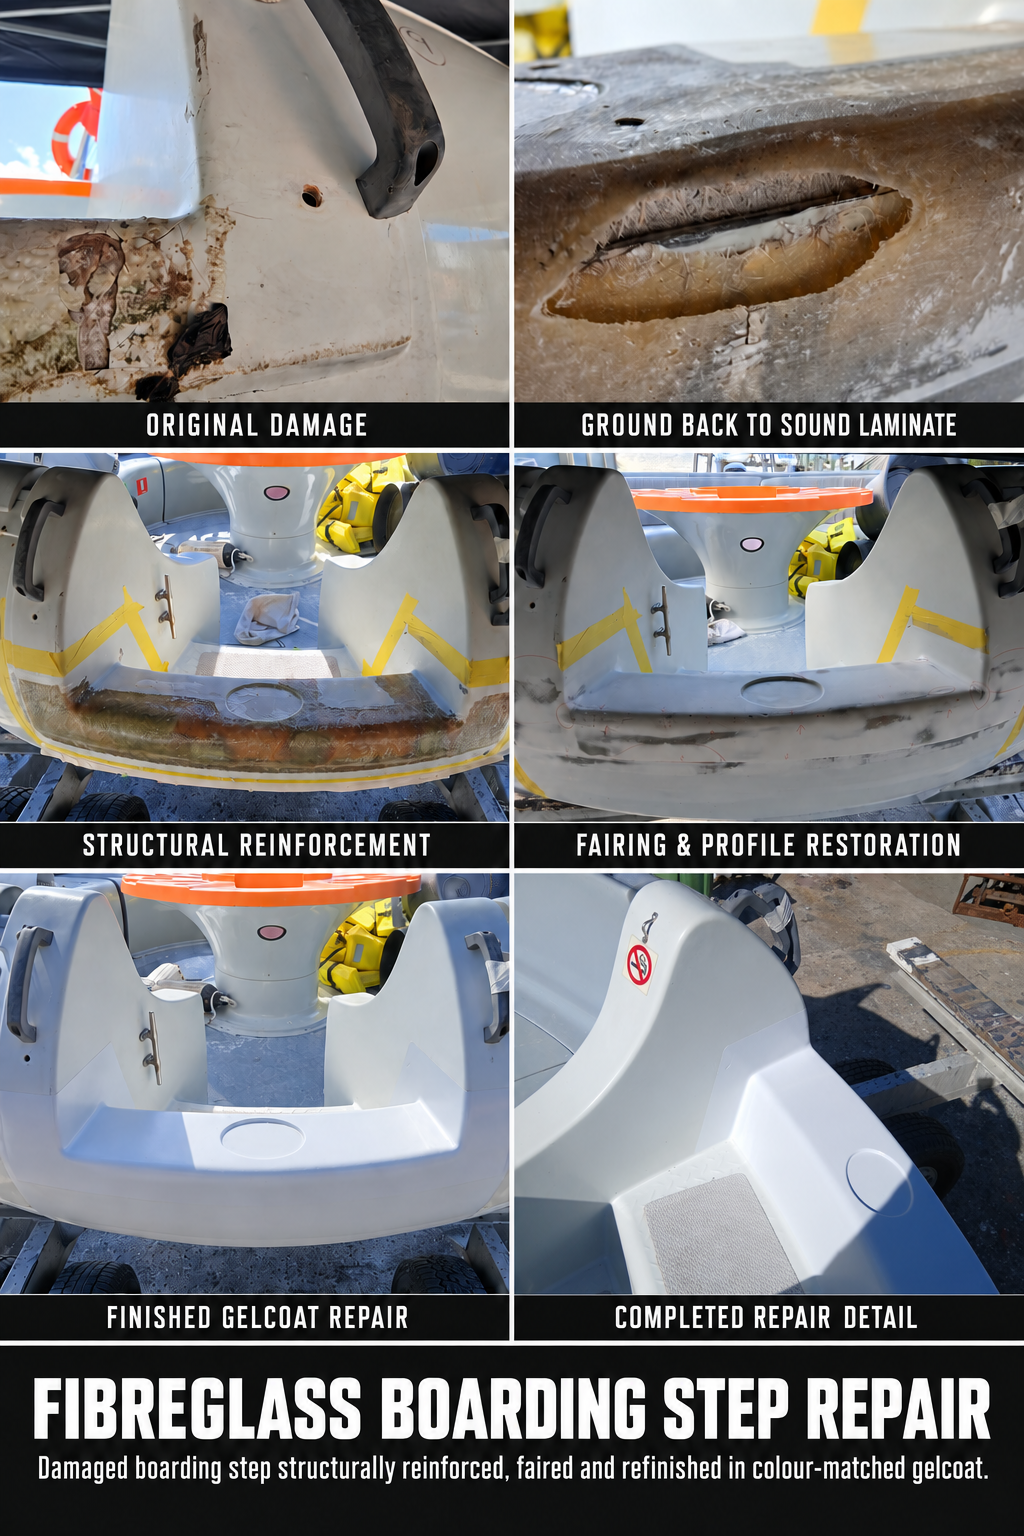
Fibreglass Boarding Step Repair
Structural Repair and Gelcoat Restoration
The vessel’s boarding step had suffered significant impact damage, resulting in cracked laminate, exposed internal structure and loss of strength through the surrounding area.
The damaged section was ground back to sound laminate before being structurally rebuilt and reinforced with new fibreglass. The original step profile was then restored through detailed fairing and finished in colour-matched gelcoat for a strong, clean and fully integrated repair.
See something that interests you?